Thursday, June 23, 2016

Vegetable Gardening - A Hobby for Everyone


The Rewards of Vegetable Gardening

If you love to have fresh produces in the spring and summer, you should consider creating a home vegetable garden.  Growing a vegetable garden is a fun and healthy hobby that anyone can excel at.

While gardening, you may find that your troubles and stresses of the day simply float away.  Home vegetable gardening relieves stress and allows you to be out in the sun.  Vegetable gardening is proven to lower blood pressure and clear the mind.  Also, the act of nurturing plants and watching them grow is rather soothing. And it can look good too!

The Pros of Organic Gardening 

One great aspect of home vegetable gardening is that it does not require a bunch of chemicals. Therefore, home vegetable gardening allows you to have more natural, juicy, and healthier vegetables that are also better for the environment.  Using a lot of chemicals on vegetables is not only unhealthy for your body, but also takes a large toll on the environment.  Growing your own vegetable garden and using less chemicals yields natural food.

Organic vegetables are always the best-tasting because they will not be picked until they are completely ripe and you are ready to pick them.  One more pro of growing your own organic vegetable garden is that it will save you money.  Instead of buying all your organic vegetables at the store, you will have your own selection of vegetables at your disposal whenever you want them.    

Anyone can create a home vegetable garden.  As long as you have dirt somewhere, you can create an outdoor vegetable garden in the solid ground.  Even if you don't have a plot of dirt, you can buy a few pots and create a container garden.  

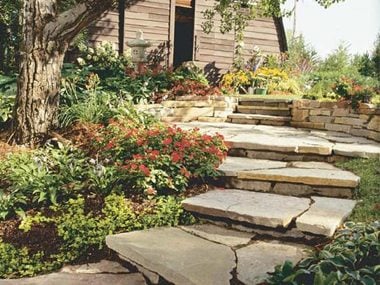
Vegetable Gardening on Solid Ground

Before starting your vegetable garden, should keep in mind these simple thoughts: size, location, and soil.

First of all, we'll discuss the location.  You must plot your garden in an area with plenty of shade and sufficient drainage.  You must nurture your plants by putting them in a place that receives about 6 hours of sunlight each day.  Every plant is different and requires a different amount of light, but the average is six hours a day.

Therefore, do not plot your garden in a shady place!  Also, make sure that your garden has adequate draining.  If you place your garden at the bottom of a hill, water will flood your plants during the wet season; this is a common mistake that many beginning planters make.  By locating your gardens away from bottoms of hills and other spots where water is likely to collect, you will prevent your vegetables from drowning!

Second of all, let's talk about size.  You should decide how big you want your garden to be initially.  Remember that you should start out small and expand later; otherwise the size of the garden may overwhelm you.  I recommend starting out with a garden space of 25 square feet or less.  After you get the hang of it, you can expand your vegetable garden as much as you would like.
   
Third, let's talk about soil.  Soil is one of the most important aspects of gardening, so it is very important to have good soil to produce a good garden.  The best type of soil is slightly loose and easy to till.  Therefore, stay away from soil that is hard-packed.  If your yard does not have a lot of good soil in it, you can fix this problem by using mulch or compost in your garden. Alternatively you can buy good soil from your local nursery.

Mulch is usually an organic covering, such as straw, leaves, compost, or peat that you can cover your garden with to enrich the soil, prevent weed growth, and prevent excessive evaporation of water.  Compost consists of any organic particle, such as dead leaves, manure, or (most commonly) kitchen scraps.  People put compost in their yards to improve the soil and provide nutrients for plants.  Composting kills two birds with one stone; it is great for your garden and cuts down on your trash.

If you address the location, size, and soil of your garden, you will have a booming vegetable garden in no time.  Also, some of these tips will also help those of you who choose to have a container vegetable garden.


Vegetable Gardening in Containers

Container gardening is the best type of gardening for many people.  If you do not have a good plot of land to garden on, container gardening is your best bet.  It is the most practical way to garden for those of us not lucky enough to have large plots of soiled land to garden on.

There are many pros to container gardening.  You can place your plants wherever you want: in your living room, on your patio, etc., so that you can add color and radiance wherever you would like.  With container gardening, you can easily place plants wherever they receive the best growing conditions.  Another pro is that you will have fewer pests eating your plants if they are in containers rather than in the ground.

Although almost any plant will grow just fine in a container, there are some that grow exceptionally well in containers.  These are: salad greens, spinach, tomatoes, eggplant, Swiss chard, radish, beets, peppers, and bush beans.  

The con of container gardening is that they require more upkeep and maintenance.  You must check up on and water many container plants everyday.

Most vegetable crops grow well in 5-gallon containers.  No matter what size container you use, make sure it has adequate drainage to ensure a bountiful garden.  You should add about 1 inch of coarse gravel in the bottom of the container to monitor drainage.  Learn how to prepare the containers of each type of plant for a nice and low-cost indoor garden.    

Gardening Problems You Can Tackle

There are two notorious enemies of gardening: weeds and pests.  Here is some basic information and helpful hints on how to tackle each of these problems:

One problem a person may have in plant gardening is staying on top of all of the weeds.  In order to prevent weeds from taking over your garden, you should go out daily and pick the weeds. Picking weeds may seem like a dull task, but if you have the right attitude, it can actually be quite relaxing and stress relieving.

Where there's a garden, there are bugs.  Unless you want to use a bunch of chemicals, you must go outside and kill any damaging bugs on your plants.  But make sure not to kill the good bugs, such as ladybugs or praying mantis, because they kill the bad bugs that eat your plants.  In fact, you can buy good bugs at your local plant store and put them in your garden to help kill pests.  Because no bugs kill big pests such as grasshoppers, you must pick off these big pests by hand.  

The Love of Vegetable Gardening

Vegetable gardening is very rewarding because it makes you feel better, less stressed, and produces delicious vegetables for you to eat.  If you like the fresh vegetables at farmer's market, you'll love to have a garden vegetable of your own to tend to and eat from.

Mary Amos loves to garden and is blessed with green fingers. Take a look at Organic Garden | Organic Vegetables [http://www.gardenswebsite.com]  to make the most of your garden. Also visit [http://www.homediyweb.com]Home Improvement | Home DIY  for home improvement ideas.

Article Source: [http://EzineArticles.com/?Vegetable-Gardening---A-Hobby-for-Everyone&id=939886] Vegetable Gardening - A Hobby for Everyone

Sunday, May 8, 2016

The siren song of the garden centre

It’s spring and our garden centres are at their busiest: tools are tidily lined up, garden furniture has been moved near the entrance, and bedding plants by the thousands are tiered on shelves like strange horticultural cakes. The gardening industry waits all year for these few months. It doesn’t matter about the weather, it’s time to sell, sell, sell. And I don’t blame them – it’s an industry which is worth around £5bn a year.Like most gardeners, I love a trip to my local nursery or garden centre. I enjoy wandering among the plants and all the associated paraphernalia. I often lose track of time in such places. I’ve been known to get lost on a Homeric odyssey after setting out for something as simple as a bag of compost. Even at the supermarket, I am often guilty of slipping plants in among the yogurt and the crisps. I can’t help it. It’s like a reflex.

Last weekend was no exception. I was at a local garden centre. I have no memory of what I actually went in to buy, but I found myself looking at a new spade. It was a beautiful spade – solid, split ash handle with a sharp steel blade so fine you could slice butter. It looked durable yet elegant, as if it would extend from my hands like a part of my own body. With a tool such as that, I’m convinced I’d be the Gandalf of gardeners. Before me seedlings would rise and dance and flower. Blackspot would retreat from my roses and blight would never settle on my potatoes. I’m sure I could grow tomatoes outdoors. With a spade like that I could probably control the weather; the rain would fall at necessary intervals and the sun would blaze in the sky. As for the foxes, they wouldn’t even dare to enter my garden.

All I need is that spade.

However, the tool I garden with now is ever so slightly different. In my garage, hanging on the wall in all its glory, is a B&Q value spade. You know the one – ugly, green plastic handle with an inexpensive composite blade that is starting to rust. It’s a spade straight from the bottom shelf. It’s an object made cheap and sold cheap; a spade which is easy to forget. If my spade was a plant, it would be an evergreen shrub in a mixed border – necessary but utterly uninteresting.

Advertisement

Yet here’s the thing: my little value spade has taught me a valuable lesson about garden centres and all their glossy marketing. Like most life lessons, it is something quite simple to understand yet hard to accept. My spade has taught me that you really only need the most basic of implements to create a satisfying garden. I didn’t always think this way. Even from the start of my gardening life, I would look at magazines and drool over ridiculously priced terracotta pots and greenhouses which probably cost more than my first flat. Like a boy in a sweet shop, I felt as if I wanted one of everything. I was sure I needed that rustic potting bench. I was certain that those Victorian glass cloches would make my courgettes grow better than any piece of plastic. And wouldn’t that rototiller make short work of my clay soil? I had to have them all.

Luckily for me, my budget, and my wife, didn’t allow for such extravagancies. So when I got my first allotment, off I tromped down to the local DIY chain and bought my value spade. I think it cost about £7. I placed in in my trolley as a child would put broccoli into a grocery basket. The thought “necessary evil” entered my mind. All in good time, I thought, I’d upgrade to tools of a more Titchmarsh standard. I was sure I was just cutting my teeth and that things would change.

That was 10 years, two children, and an entirely new garden ago. And through it all has been my little green value spade. We’ve stay together like a married couple. At times the relationship has been trying, and there were moments when, in silent anger, we both contemplated separation. But, in the end, my spade and I have persevered and forged a good life together. Yes, we’re happy. We’ve made it.

Of course, if you want to recreate one of Capability Brown’s sweeping landscapes, then you are going to need deep pockets. However, for us commoners, there are economically viable solutions to any plot. When it comes to tools, simple is usually best. I get by on most days with a trowel, my value spade, and a garden fork. And really, who needs a dibber when you have a perfectly good finger. As for plants, basic packets of hardy annuals can be planted and will return year after year. Perennials spread easily too. I have found geraniums and leucanthemums growing in my beds which have jumped over from a neighbour’s garden. After a few years and several divisions they are now filling up my garden for free. Many people are happy to share and swap plants or give away old equipment. I’ve found gardeners are some of friendliest and most compassionate people I have ever met; ask for help and they’ll be happy to get you started. In short, while we would all love unlimited resources, the reality is that most of us garden on a budget and we all find ways to creatively cultivate the garden we desire.


Therefore this spring, as usual, I will attempt to control my spending and try to remember that glossy gardening equipment isn’t always necessary. That said, I am planning another trip to the garden centre in the next few weeks. Oh, and don’t tell anyone, but I may go back and look at that spade. It’s just so lovely. Maybe I will buy it. Maybe. It would be nice. I probably won’t, but it’s worth a look. Just don’t let my value spade find out; I wouldn’t want any hurt feelings.

Source: http://www.theguardian.com

Monday, April 18, 2016

Shade Gardening Some Tips from Hawaii.

Shade Gardening
In case you're a first time plant specialist, or you've acquired your patio nursery alongside your home, then you'll most likely not have seen that your greenery enclosure has a shaded zone. Trust me it will have a shaded space some place, regardless of the fact that it is in the very corner of the yard. That is the reason you'll should be doing shade planting this year. Executed appropriately, your shade greenery enclosure can take you through for quite a while.

On the off chance that you discover the shade in your patio nursery is because of a tree or trees, regardless of the possibility that it is your neighbor's tree, you'll see that the dirt will be dry and brimming with roots. Planting might be troublesome and you may need to enhance the dirt somewhat before anything will develop. Be cautious while doing this as a few trees, similar to Oak, are exceptionally specific, and can be to a great degree touchy to changes in soil profundity. Likewise, in the event that you need to till the dirt around the roots, you'll again should be exceptionally cautious as root breakage may happen and the tree may be harmed in the long haul. Nobody ever said shade planting would have been simple!

In the event that you as of now have a little lake or lake in your greenery enclosure, or even a bit of winding stream, your water cultivating endeavors recently turned into that much simpler. Lamentably, for most by far of mortgage holders, such a reward is simply not on the cards, so you'll need to fabricate your water garden without any preparation.

While picking your plants, you'll need to remember the conditions that are liable to be pervasive inside your shaded territory. Low, dappled daylight, to maybe no sun at all or maybe sun at just certain seasons of the day. Constrained water in the dirt because of a broad root framework, poor air flow created by low lying branches, or meddlesome dividers. These are just a percentage of the conditions you'll need to manage when shade cultivating.

Having gone through the more genuine parts of shade cultivating, we can now proceed onward to the better time parts. To be specific planning, and laying out your greenery enclosure, and purchasing your plants!

Since plants that flourish in the shade aren't as striking and splendid as plants that develop in full daylight, it's ideal in the event that you incline more towards blooms with pastel shades, as darker hues will just tend to mix away from plain sight.

Foxgloves are a top choice, as are Daisy's, and Begonias. Bluebells and Forget-me-nots are additionally some good 'ol fashioned top picks. On the off chance that you arrange your shade cultivating deliberately, you can have sprouting blossoms for just about the entire year.

Different plants to consider are groundcovers. Hosts, are generally a decent groundcover plant, with its enormous leaves that tend to embrace the ground. English ivy, Wintercreepers, and Ajuga are likewise useful for groundcover.

Regardless of what you choose, ensure that you appreciate shade cultivating, and every one of the advantages it can convey to you, similar to the genuine feelings of serenity and unwinding that you can get from the common quelled hues offered by the shaded greenery enclosure.

Shade Gardening Some Tips from Hawaii.

In case you're a first time plant specialist, or you've acquired your patio nursery alongside your home, then you'll likely not have seen that your greenery enclosure has a shaded zone. Trust me it will have a shaded space some place, regardless of the possibility that it is in the very corner of the yard. That is the reason you'll should be doing shade planting this year. Executed appropriately, your shade greenery enclosure can take you through for quite a while.

In the event that you discover the shade in your patio nursery is because of a tree or trees, regardless of the possibility that it is your neighbor's tree, you'll see that the dirt will be dry and loaded with roots. Planting might be troublesome and you may need to enhance the dirt marginally before anything will develop. Be watchful while doing this as a few trees, similar to Oak, are exceptionally specific, and can be to a great degree touchy to changes in soil profundity. Additionally, in the event that you need to till the dirt around the roots, you'll again should be exceptionally watchful as root breakage may happen and the tree may be harmed in the long haul. Nobody ever said shade cultivating would have been simple!

On the off chance that you as of now have a little lake or lake in your greenhouse, or even a touch of winding stream, your water cultivating endeavors recently turned into that much simpler. Tragically, for by far most of property holders, such a reward is simply not on the cards, so you'll need to assemble your water garden starting with no outside help.
Shade Gardening

While picking your plants, you'll need to remember the conditions that are prone to be predominant inside your shaded zone. Low, dappled daylight, to maybe no sun at all or maybe sun at just certain seasons of the day. Constrained water in the dirt because of a broad root framework, poor air course brought on by low lying branches, or meddlesome dividers. These are just a percentage of the conditions you'll need to manage when shade cultivating.

Having gone through the more genuine parts of shade cultivating, we can now proceed onward to the better time parts. Specifically outlining, and laying out your patio nursery, and purchasing your plants!
Shade Gardening

Since plants that flourish in the shade aren't as clear and brilliant as plants that develop in full daylight, it's ideal on the off chance that you incline more towards blossoms with pastel shades, as darker hues will just tend to mix away from plain sight.

Foxgloves are a top pick, as are Daisy's, and Begonias. Bluebells and Forget-me-nots are likewise some good 'ol fashioned top picks. On the off chance that you arrange your shade planting deliberately, you can have blossoming blooms for nearly the entire year.

Different plants to consider are groundcovers. Hosts, are customarily a decent groundcover plant, with its enormous leaves that tend to embrace the ground. English ivy, Wintercreepers, and Ajuga are additionally useful for groundcover.
Shade Gardening

Regardless of what you settle on, ensure that you appreciate shade cultivating, and every one of the advantages it can convey to you, similar to the true serenity and unwinding that you can get from the characteristic curbed hues offered by the shaded greenhouse.

Plz check here : http://amzn.to/1UKawHx

Saturday, April 9, 2016

Developing Roses Types of Roses For Your Rose Garden

You've chosen you need to develop roses. You've perused my past article and you have an arrangement. You know:

1. Your level of cultivating ability - this will help you decide the sort of roses you need to develop.

2. The amount of space you can accommodate developing roses.

3. That the range you have decided for developing roses gets no less than 6 hours of daylight every day.

4. That there will be satisfactory ventilation in your rose developing spot.

5. There is adequate seepage so they don't get waterlogged when they get what might as well be called around one inch of downpour every week.

Presently we get to the truly fun part - picking what kind of roses to develop!

A few roses are less demanding to develop than others and every sort will develop to an alternate size and even have distinctive sorts and quantities of blossoms . I get a kick out of the chance to have early achievement when I begin an undertaking like this, so I will quite often pick the sort of roses that will manufacture my rose developing certainty. You may like even more a test, so examine these distinctive sorts of roses and see what speaks to you.

Old Garden Roses. These are my most loved as they contain a percentage of the most seasoned classes of roses and come in each size. They have a solid aroma with blossoms that sprout in any shading you like. Huge numbers of this sort of rose are rehash shorts - you get the chance to appreciate the blooms and scent numerous times amid the developing roses season! They are likewise among the hardiest of roses - they can withstand a wide assortment of atmosphere and climate changes. Sounds like an incredible sort of rose to begin with.

Half and half Teas - These are the sort that for the most part strikes a chord when discussing "roses." They have a solitary expansive blossom (or sprout) toward the end of a long stem and the blooms come in wide assortment of hues.

Climbing Roses - These are the roses you see developing on trellises. They are enthusiastic cultivators and can develop to exceptionally incredible statures. They make a phenomenal setting for a yard or greenery enclosure, be that as it may, they must be prepared to develop on a trellis or up structures. Climbing Roses are accessible in a wide assortment of hues, can be rehash drawers and the blossoms can be single expansive sprouts or littler numerous sprouts.

Floribundas - The blossoms of these roses have a tendency to be littler and come in bundles instead of single sprouts. Due to their littler size, they are anything but difficult to develop in holders, a genuine in addition to if space for developing roses is restricted, or you simply need to improve your arranging as opposed to have an out and out rose greenhouse. These roses were known as cross breed polyanthas before the 1940's (a few trivia to inspire your neighborhood nurseryman!).

Small Roses - these are for you in the event that you don't have a yard! Yes - you can develop roses without have a ton of outside space. This rose sort is developed in its own root stock making it amazingly strong. The plants themselves are little with blossoms running from one-half crawl to two inches in size and they bloom persistently.

Since you have some information about the rose sorts and you have an arrangement for developing roses head out to your neighborhood nursery to see the diverse sorts of roses accessible. That will help you choose what sort, size and shade of roses you need to develop!


1. Your level of planting ability - this will help you decide the sort of roses you need to develop. 2. The amount of space you can accommodate developing roses. 3. That the region you have decided for developing roses gets no less than 6 hours of daylight every day. 4. That there will be sufficient ventilation in your rose developing spot. 5. There is adequate waste so they don't get waterlogged when they get what might as well be called around one inch of downpour every week. Presently we get to the truly fun part - picking what sort of roses to develop!

A few roses are less demanding to develop than others and every sort will develop to an alternate size and even have distinctive sorts and quantities of blooms . I get a kick out of the chance to have early achievement when I begin a task like this, so I will quite often pick the sort of roses that will construct my rose developing certainty. You may like to a greater extent a test, so investigate these diverse sorts of roses and see what speaks to you.

Old Garden Roses. These are my most loved as they contain a portion of the most seasoned classes of roses and come in each size. They have a solid scent with blossoms that sprout in any shading you like. A large portion of this sort of rose are rehash knickers - you get the chance to appreciate the blossoms and aroma numerous times amid the developing roses season! They are additionally among the hardiest of roses - they can withstand a wide assortment of atmosphere and climate changes. Sounds like an incredible kind of rose to begin with.

Cross breed Teas - These are the sort that generally strikes a chord when discussing "roses." They have a solitary huge blossom (or sprout) toward the end of a long stem and the blooms come in wide assortment of hues.

Climbing Roses - These are the roses you see developing on trellises. They are fiery producers and can develop to exceptionally extraordinary statures. They make a fabulous setting for a yard or greenery enclosure, in any case, they must be prepared to develop on a trellis or up structures. Climbing Roses are accessible in a wide assortment of hues, can be rehash shorts and the blossoms can be single expansive sprouts or littler numerous blossoms.

Floribundas - The blossoms of these roses have a tendency to be littler and come in groups as opposed to single sprouts. In view of their littler size, they are anything but difficult to develop in holders, a genuine in addition to if space for developing roses is constrained, or you simply need to improve your finishing instead of have an out and out rose greenery enclosure. These roses were known as half and half polyanthas preceding the 1940's (a few trivia to awe your nearby nurseryman!).

Smaller than usual Roses - these are for you on the off chance that you don't have a yard! Yes - you can develop roses without have a ton of open air space. This rose sort is developed in its own root stock making it greatly tough. The plants themselves are little with blossoms going from one-half creep to two inches in size and they bloom constantly.

Since you have some learning about the rose sorts and you have an arrangement for developing roses head out to your nearby nursery to see the diverse sorts of roses accessible. That will help you choose what sort, size and shade of roses you need to develop!

Haynes Miller is an enthusiastic plant specialist whose adoration for rose developing started in her grandma's greenery enclosure. She imparts her adoration for developing roses to her little girl, who cherishes heading off to the nursery to view all the diverse sorts and selects the shades of the plants.

Wednesday, April 6, 2016

Asparagus: You Can Grow That!


Nothing says, "SPRING!" like fresh Asparagus. With no real work on my part, I was able to get a decent harvest of Asparagus this week from my community garden plot. The only thing this perennial vegetable really requires is patience.

Having to three years from the initial planting date was a real test of my patience, but the wait is worth it. They are so tender fresh from the garden that I do not bother to cook them in any way, I just snack on them raw.


To plant them, buy Asparagus crowns via mail-order or in bags from your local garden center. Plant them in a trench about 6-12-inches deep and a foot wide in a sunny spot in your garden. Add in some organic compost when re-filling the hole and then keep the area well-mulched.
I let strawberries encroach in my Asparagus bed as their surface-runners don't really interfere much with the Asparagus roots, but you really should keep it weeded and free of interloping plants.


Other than that, the only other thing I do is tie-up the long Asparagus fronds in the summer and fall with a bungee cord as they like to flop over into the pathways. These get cut back and composted at the end of the growing season.

If I had to do it all over again, I definitely would have started off the first year in my garden plot with Asparagus, instead of waiting for year two. I also would have planted much more of it. I started with only three rootlets and I am harvesting a decent amount, but I am greedy for more, more, more!

Source: http://washingtongardener.blogspot.com/2016/04/asparagus-you-can-grow-that.html

Tuesday, April 5, 2016

Begin a Vegetable Garden Today


Kick up your heels, the sun is at long last sparkling! Get out and notice the blossoms and dive in the earth and develop your supper and your breakfast as well! It's anything but difficult to develop your own particular natural sustenance and beat the high costs, for nothing. You can likewise develop excellent blooms. Spring is an ideal opportunity to begin.

The initial step to developing your patio nursery is to locate a decent spot with no less than 6 hours of direct sun. Next, picture your fantasy cultivate and envision all your most loved vegetables. At that point make a patio nursery arrangement. At long last set up your patio nursery quaint little inns your greenery enclosure!

Garden Plan:

So what goes into a greenhouse arrangement? What do you jump at the chance to eat most and what will develop well in your area? Each great arrangement will comprise of:

* A rundown of your most loved patio nursery vegetables and blooms

* Garden bed design: sort, shape and situation of your greenhouse quaint little inns plants

* First and last ice dates

* Compost Area

* Water framework

* Optional - green house or chilly edge


Every one of these components will interrelate and improve each other, making a fine-looking patio nursery. Draw out an arrangement and request your seeds! In spite of the fact that planting is adaptable and continually developing, having a strong arrangement set up first will help you maintain a strategic distance from disappointment and give you a decent begin. You can draw out your arrangements by hand or utilize a percentage of the new on-line garden arranging programs. I have a fabulous time working with an on-line organizer this season interestingly. I have constantly done my patio nursery anticipating paper and there was dependably bunches of eradicating, changes and unfinished versions. Making garden arrangements used to be an unpalatable and untidy errand for me. Presently I am having a fabulous time utilizing an on-line cultivating instrument for making my greenery enclosure arrangement, and transforming it and playing around as much as I need in not more than seconds. When you have a decent arrangement and a rundown of all your most loved veggies' the time has come to arrange your seeds or purchase some from your nearby nursery or food store.


Set up your greenhouse beds:

There are numerous alternatives for making garden beds, some include: raised beds, square-foot cultivating, or antiquated hand or tiller burrowed garden beds. On the off chance that you have a substantial greenhouse, out-dated greenery enclosure beds are most likely the best. In the event that you have a little region, raised beds or square-foot cultivating will be the most gainful.

Begin little if this is your first garden. Be sensible and don't get overpowered. It is ideal to have a delightfully kept up patio nursery that you can deal with than a major weed fix that is overwhelming to the point that you fear going in your greenhouse. You can get an astounding measure of incredible sustenance out of a little garden.

Fertilizer is vital. Try not to defer, begin your manure today! Transform your trash into gold.

Regardless of how huge your patio nursery is and where you put it, you should encourage your dirt. There is nothing that contrasts and rich fertilizer for developing beneficial greenery enclosures. Continuously develop natural! For your wellbeing and the strength of the planet, it simply doesn't bode well and costs more to utilize concoction manures, herbicides (weed control) or pesticides. I have been developing my nourishment naturally for more than 30 years and have excellent, gainful patio nurseries! It is vital to recognize what supplements your dirt is rich in and what supplements you should add to have a gainful greenhouse. Test your dirt and include the required natural supplements. Give the dirt a chance to settle and afterward plant seeds and begins and you will soon be eating a portion of the best sustenance you have ever tasted and will presumably have enough for the majority of your companions as well.


I trust you are roused to plant your natural garden today. Here's to an incredible patio nursery season!

Rancher Dave

Rancher Dave is here to give you some assistance with regards to beginning a natural vegetable patio nursery. Throughout the previous 35 years our crew has been becoming more than 80% of our nourishment in expansive natural greenery enclosures on our residence ranch which incorporates a horse shelter and a milk dairy animals, a few goats and chickens.

Begin with a fantasy, plan on a reality. I am eager to share this new cultivating arrangement  that I have been utilizing. It is fun and simple to utilize and will give you a decent begin in developing your own nourishment and sustaining your crew preferred sustenance over cash can purchase. I am additionally offering a one of a kind simple to take after natural cultivating digital book which will give you parts more points of interest on the making of an inexhaustible natural harvest of a percentage of the best nourishment you will ever taste. So appreciate this cultivating course and let me know how you like it. Think Global, Plant Local and stay in contact.

Monday, April 4, 2016

The most effective method to keep your patio nursery alive through winter


The Majority of planters surrender when harvest time hits and don't venture out on the grass again until spring yet there are a lot of exercises to keep a patio nursery being used amid the winter months which mean you don't need to sit inside fiddling with your window wicker container. Given the length and profundity of this winter it may be worth keeping up a year long cultivating arrange else you may not get sloppy for a long time.

Regardless of the fact that you simply need to plan for the spring you can develop cover crops which won't just furnish you with a movement yet enhance the dirt for the following season. Fertilizer will likewise keep on breaking down giving you a lot of fuel to kick begin your cultivating when the sun begins to sparkle.

In the event that you are hoping to develop plants amid the winter it is evident to pick to develop them in nurseries, cloches or cool casings. You might need to get ready by planting knobs, for example, daffodils, day lilies and tulips in the late harvest time/early winter which will no doubt blossom towards the end of winter before the spring season even starts, so you don't need to exit to an infertile patio nursery come spring.


To appreciate shading over the cool months take a stab at developing plants in compartments or brought beds up in which you can control the temperature, the dampness and give a superior soil to them to survive the chilly. These plants wouldn't ordinarily be the pride of your patch yet they will give some movement and when spring arrives you can plant them specifically into the ground and let them flourish.

For an essential supply of supplements for any evergreen plants and a key to keeping up the strength of your greenery enclosure through the winter it is useful to screen your treating the soil and ensure it gets turned consistently and has new natural material. It is additionally an incredible asset for new plants in the following season when the fertilizer has settled.


There is a determination of ice strong yields can make utilization of your dirt and give an arrival on the off chance that you need to develop a few vegetables amid winter. Snappy developing vegetables like turnips can be a decent expansion that may not make extraordinary results all through winter but rather offer an advantageous cultivating action.

Wednesday, March 30, 2016

5 Awesome Gardening Tips for Inspiration


Gardening for some is a hobby, for others it's a passion. Either ways, gardening demands patience, carefulness and a positive attitude. But knowing some tips and tricks always comes in handy. If you are a beginner looking for some guidelines or if you're an expert who is trying to figure out where have you been going wrong, this article is for you. We have gathered some expert gardening tips that will help you take your gardening experience to a whole new level.

Prepare the Soil well

Plants grow in soil, the soil is what nourishes and nurtures them and provides support to the roots to grow. Therefore, it is very important that you carefully prepare the soil before planting anything in it. Take into account the demands of your plant and the soil type that it tends to do well in. if your soil is not up to the standard, treat it. Divide the soil among different kind of plants that you are planning to grow according to their requirements. The best kind of compost to feed your soil is leaves. Leaves make for the best fertilizer and are totally natural. Also, they are abundant in any garden, so use them to your advantage.

Tuesday, March 22, 2016

How to grow cucumbers

How to grow cucumbers

Savour the taste of summer with your own home grown cucumbers. Cucumbers are an essential ingredient for adding to sandwiches, delicious salads, and those long, cool summer drinks on the patio.

You don’t need a greenhouse to grow them as there are indoor types and outdoor varieties available. But it’s worth checking that you have the right type for your garden before you start sowing. You can grow cucumbers in the ground, in growbags and even in containers. View all of our cucumber seed varieties.

Different types of cucumber
Growing cucumber plants is really quite easy once you understand that there are two main types available, and these need different treatment to produce a good crop. So to keep things simple, here are the main differences between greenhouse and outdoor cucumbers.

Greenhouse cucumbers
If you’re lucky enough to own a greenhouse then it’s well worth growing cucumbers indoors. Greenhouse cucumber plants produce long, smooth fruits similar to those that you find in the supermarkets. Greenhouse varieties don’t need pollinating - in fact, you should remove any male flowers to prevent pollination happening as this produces fruits with a bitter flavour. You can even buy ‘all female’ F1 hybrid varieties such as Cucumber ‘Flamingo’ which only produce female flowers, so you won’t need to worry about male flowers at all!

Outdoor cucumbers
Outdoor varieties are called ridge cucumbers. These varieties tend to be shorter with a rougher skin but have the advantage of being able to crop outdoors, so they are perfect for gardens without a greenhouse. Ridge cucumbers produce male and female flowers, and these need to be pollinated. This is not usually a problem though, as the insects outdoors will do the job for you.

Some ridge cucumbers are suitable for growing in the greenhouse if you prefer, but most gardeners would rather use their precious greenhouse space for greenhouse-type cucumbers. It’s important to never grow ridge cucumbers in the same greenhouse as an ‘all-female’ Greenhouse type as this will lead to cross-pollination, which can produce bitter fruits.

If you’re feeling adventurous you can even try growing white and yellow cucumbers or even ball shaped varieties. Some are ridge cucumbers while others need to be grown in the greenhouse. Always check before you sow them.

Growing Cucumbers from seed
Whether you are growing indoor or outdoor types you will need to sow Cucumber seeds in a propagator from early March to April. However, outdoor varieties can also be direct sown outdoors from May to June if necessary.

Sow cucumber seed on their sides at a depth of 1cm (½") in 7.5cm (3") pots of free-draining, seed sowing compost. Place the pots in a propagator or seal them inside a plastic bag at a temperature of 20C (68F) until they germinate. This usually only takes 7-10 days.

Once they have germinated you can move them to a bright windowsill and grow them on until they are large enough to be transplanted. Try to maintain a minimum temperature of 15c (60F) and keep the compost moist but not wet. Cucumber seedlings can be prone to scorching so take care to shade them from direct sunlight. When cucumber plants are well grown, you can carefully transplant them, but try to avoid disturbing the roots as Cucumbers resent this.

How to grow cucumbers in a greenhouse
Greenhouse types can be planted in a warm, humid greenhouse that is kept at a temperature of at least 15c (60F). Plant greenhouse cucumbers at a spacing of 2 plants per grow bag or 45cm (18") apart.

How to grow cucumbers outdoors
Ridge cucumbers should be gradually acclimatised to outdoor conditions over 7-10 days before transplanting into warm, well drained, humus rich soil. Choose a sunny position with shelter from strong winds. When growing cucumbers outdoors they can be planted in single rows at a distance of 90cm (36") apart.

Routine care
When growing cucumbers it is essential to keep them well watered to help your plants establish and to increase crop yields. Feed your cucumber plants with a high potash feed every two weeks once the fruits begin to develop.

Greenhouse Cucumbers
Keep the greenhouse warm and humid by regularly spraying or damping down of pathways. You will probably need to apply some greenhouse shading to protect the plants from scorching.
Trailing types will produce higher yields if made to climb. Train the main shoots onto 1.8m (6ft) canes or strings until they reach the top of their support and then pinch out the growing point at the top of the plant. Once the fruit begins to develop, pinch out the end of each side shoot, leaving two leaves after each fruit. This helps to encourage more sideshoots which will produce bigger crops of cucumbers
Always remove the male flowers from greenhouse cucumbers. Female cucumber flowers can be identified by a swollen bulge between the bottom of the flower and the flower stem that looks like a tiny cucumber. Male flowers just have a plain stalk so you can easily tell them apart.

Outdoor cucumbers
Cucumbers growing outdoors will not need training onto canes - just let them sprawl across the ground.
Ridge cucumbers can be pinched out at the main stem after 7 leaves have formed to encourage fruiting side shoots to develop.
Outdoor ridge types require pollination by an insect which needs both male and female flowers to be present - do not remove the male flowers from these varieties.

Harvesting cucumbers
You can normally begin to harvest cucumbers around 12 weeks from sowing. Harvesting cucumbers is best done early in the morning when temperatures remain cool. Cut the fruits from the plant using secateurs or a sharp knife. It’s best to harvest cucumbers while they are young and tender, before they show signs of producing seeds, as older fruits can become bitter. Regular harvesting will encourage long continuous production - outdoor types can continue to fruit until September, while greenhouse types can fruit into October if temperatures are warm enough.

Source: http://www.thompson-morgan.com/


Saturday, March 5, 2016

7 tips for 'Garden Warfare 2', whether you're undead or a vegetable

1. Try Super Brainz or Kernel Corn first
For brand-new players who aren’t sure where to start among the new characters, Super Brainz is probably the most versatile zombie.The dual ranged and melee main attacks are both forgiving in terms of accuracy, and the vortex special ability is a powerful way to get outof a tight corner.

On the plant side, Kernel Corn is the most classic of the newcharacters, an all-around solid pick. Like Super Brainz, it has apowerful attack for escaping mobs of baddies. Add extra firepowerfrom the missiles or the butter airstrike, and you have strong toolsto help press the advantage in combat.
As you find your footing, though, each of the other characters have somepowerful options. Citron is hard to kill and Rose can manage thebattlefield with crowd control. The Imp’s small size makes it atricky moving target while Captain Dreadbeard can strike from afar.

2. Don’t forget alternate abilities
The original Garden Warfare took its time rolling out special attacks. You had to unlock all three for each class and got a video focused on the new skill. In this sequel, there is a splashy video that shows all three special skills, but not how to control or execute them. It's best to find a chill game mode to experiment with your attacks and how they can complement each other.

Also, the game doesn’t explain that some abilities have additional controls or power-ups. For instance, two of the new zombie classes have different main attacks depending on whether they’re zoomed in or not. That means Super Brainz and Captain Dreadbeard can throw down at close and long range — just decide whether or not to look down your scope. Citron also has additional controls for its ball mode, allowing for mobility and damage. Even though the action can get chaotic mid-game, sneak a peak at the controls in the lower right corner of your HUD to make sure you know all the skills at your command at any given time.

3. Infinite ammo still has a cooldown
Some of your hero options have main attacks with infinite ammo. If that weapon is any type of gun, though, "infinite" does still have some restrictions. Both Citron’s orange beam and the heroic beam for Super Brainz will overheat if you sit on the trigger for too long. So even though you don’t need to reload, you’ll still need to take pauses.Super Brainz has unlimited punches for his melee heroic fists, but those attacks have pacing built in. It’s a triple-hit that ends on a big uppercut. The zombie takes a quick breather before he can continue pummelling, even if you’re still pressing the trigger.Plan accordingly.

4. Stickers (and coins) are your friends
Given the casual origins of the mobile Plants vs.Zombies game, one might assume that a mechanic of coinsand stickers are just cosmetic. Think again. The stickers, boughtwith in-game coins, include a range of content that can have a bigimpact on your gameplay options.

First, they contain the small minions that help you out inGraveyard Ops or Garden Ops missions, as well as the central flagcontrol game. Those can offer a big boost, especially when you’replaying solo. Second, they have alternate costume pieces for each ofthe heroes. Again, these aren’t just for show. These alternateidentities can include different weapons and skill upgrades. Forinstance, you can turn Rose’s attacks into frosty, slowing ones, orCaptain Dreadbeard can become a more damaging fire attacker. Besideslooking cool, these customizations can give you a little extra edgein the multiplayer matches.

Just about any activity in the game can reward you with coins. So keep playing and keep up with buying packs.

5. Check the Quest Board regularly
Garden Warfare 2 puts more responsibility onplayers to manage their progress through the levels than itspredecessor. The good news is that with this model, you can level upquickly by choosing the quests that match the characters and gamemodes you enjoy the most. Those quests offer experience mutipliersand stars, an in-game currency for unlocking special reward chests.

The flip side of that player agency is that you’re in charge ofkeeping your quest log full. You can have as many as seven activequests at any time. More completed quests means faster leveling andmore access to chests.

6. Explore and play the main map
Rather than spending time in lots of menus, GardenWarfare 2 has created an open-ended main map where playerscan direct their own session. With hubs for the solo quests,character selection, splitscreen, multiplayer and more, there’splenty to explore and play in the main areas for the zombies andplants.

But don’t forget to wander outside the strongholds. The flagcontrol game at the center is a great way to test your skills andearn coins. Plus you may find chests or quests hidden around the map.These can offer big rewards fof coins or stickers, which, as we’veexplained, further your characters’ awesomeness.

7. Read the in-game tips
Finally, the in-game tips appear at the bottom of the screenduring loading. Some of them just emphasize the universe’s oddballsense of taco- and brain-fueled humor, but others have good insightsto help your game strategy. For instance, did you know that the Imp’smech is more susceptible to Citron’s shock attack? Stay alert inthe down time and you may just learn something valuable.  

Source: http://mashable.com/2016/02/29/plants-vs-zombies-garden-warfare-2-tips-guide/#nUqZNOfJHgqB

Thursday, March 3, 2016

How Much Water Do Vegetables Need?

A good general guideline is an inch of water per week, either by rain or watering; in arid climates, it is double that. In hot weather, vegetables need even more water, up to about ½ inch per week extra for every 10 degrees that the average temperature is above 60 degrees.
By definition, the average temperature is the daytime high plus nighttime low, divided by 2. So, if the high is 95 and the low is 73, the average is 92 + 73, divided by 2. The answer is 82.5. In this case, the garden needs at least another inch of water. This explains why most vegetable gardeners in hot climates just laugh at the “1 inch of water per week” recommendation. That simply doesn’t work in really hot weather for squash, eggplant, tomatoes, and other crops that need lots of water and have big leaves that wilt easily.
You can measure an inch of water by putting a rain gauge or even a plastic container or other container under your sprinkler, soaker, drip, or other watering system. You’ve applied an inch of water when the vessel collects water an inch deep.

Saturday, February 27, 2016

6 Golden Rules for Planning a Garden

Most successful gardens have foundation plants, trees and shrubs, and ground cover, along with perennials, annuals, and vines. Here's how to choose what works best for you.

Planning your foundation plantings.Foundation plantings—the small trees and shrubs planted around the perimeter of the house—soften the straight lines of the building and ease the transition from the house to the flower bed and lawn. Choose trees and shrubs that look good year-round and won’t grow too large for the spot. Place them so they won’t grow into the house, damage the foundation with their roots, or block entrances and windows when they are mature. Evergreens work in cold climates, because they keep their foliage and color all year round; several yews in a row with a tall evergreen on the corner of the house is a timeless arrangement.Planning your trees.Before you go to the nursery, think about what you want—and don’t want—in a tree: height, width, form, bark texture and color, fruit or berries, flowers, when the tree drops its leaves and over what period of time, seasonal color and interest, disease problems, suitability to your climate, how much shade it will create when mature, pruning needs, as well as sun, soil, and water needs. A crabapple, for example, has gorgeous blossoms, but unless you choose a sterile variety, it will produce thousands of little fruits, which can litter walks and drives. Trees may be evergreen or deciduous. Evergreens are great for spots that need some green year round; deciduous trees offer more variety, changing their look with each season, and offering beautiful leaves, flowers, and fruit.Planning your shrubs.Entire gardens created with shrubs and shrub borders are low-maintenance alternatives to flower borders. When choosing a shrub, consider characteristics besides size—flower or berries; bloom time; leaf form and seasonal color; requirements for sun, soil, and water; and pruning needs. Like trees, shrubs are classified as either evergreen or deciduous. They can fill a landscape with flowers, fragrance, greenery, color, and form in a way that belies their size.Planning your ground covers.Ground covers require less maintenance than a lawn, so use these plants in areas that receive little traffic. Nearly any low-growing, spreading plant can be used for ground cover. The thicker and more vigorously a ground cover grows, the less you will need to weed the area and the less watering or other care it will need. When selecting a ground cover, consider height and spread; foliage color throughout the year; thickness of growth habit; disease resistance; soil, water, and sun needs. You will also need to find out how well the ground cover will coexist with other plants it might be near—some types of ground cover are so vigorous they choke out less aggressive plants. Top picks for ground cover include ajuga, hedera, hosta, lily-of-the valley, pachysandra, spreading juniper, and vinca.Planning your perennials and annuals.Perennials come back year after year, blooming for two weeks or even all season long, depending on the variety. They are more expensive initially, but save money over time. Annuals die after one year. They are less expensive than perennials initially, but must be replaced each year. A few begin blooming in late winter or early spring, but most bloom in mid-to late spring and provide color for months. A good local nursery will feature those that are easiest to grow in your region, but ask about sun, soil, and water requirements; how long it blooms; what the flower looks like; and any diseases or pests that threaten it. When choosing a perennial, also ask if the plant dies back in cold weather or, if not, what the foliage looks like throughout the year.Planning your vines.Vines add greenery or color to create vertical interest in your garden, and use little ground space. They're also useful in creating privacy, hiding eyesores, and making the most of a small garden. Whether you choose an annual or perennial vine, pay attention to how it will attach itself to its support. Some vines (such as morning glories, wisteria, honeysuckle) twine, others (clematis, grapes, most sweet peas) send out tendrils. Still others (such as trumpet creeper, ivies, climbing hydrangea) cling with “holdfasts” or tiny suction cups. The clinging types are somewhat permanent and are suitable only for brick, stone, and other surfaces that are virtually maintenance-free. Some vines, such as large-flowered clematis, take two or three years to attain just six to ten feet. Others, such as wisteria, grow that much in a year, reaching 40 feet or more and toppling all but the sturdiest supports.

Thursday, February 25, 2016

How to Grow Grapes

Learn how to grow grapes in your own garden.

Discover how to grow grapes, and you'll enjoy the amazing pleasure of picking a grape fresh off the vine and popping it into your mouth. When you bite into a grape that's warm from the sun and bursting with juice, you'll be hooked on growing grapes.

When we think of growing grapes, we dream of green or purple table grapes (the kind you eat fresh), jams and jellies, or perhaps a good wine grape, just in case you want to make your own Cabernet.

Knowing how to grow grapes successfully means selecting the right variety for your region. Grapes will grow in almost any part of the country (Zones 5-9), but you need to choose one that suits your local conditions of summer heat and winter cold. Your local extension office can suggest a specific variety, whether table or wine.

Grapes need full sun all day whatever the region you live in, and well-drained soil that's free of weeds and grass -- you don't want any competition for water and nutrients. Just think of all those pictures you've seen of the Italian hillside vineyards -- that's what you're aiming for.

Are you ready to grow more edibles? Check out our guide to vegetable gardening.

Planting Grapes
Plant grapes in early spring, when you'll find bare-root varieties available. As you plant, cut the existing root back to 6 inches; this will encourage feeder roots to grow near the trunk. The root system of a grapevine can grow deep, so well-cultivated soil is best. You will probably need to do some pruning at planting time, too. Prune off all except for one stem, and then look for the buds on the stem; cut the stem back to only two buds. You're on your way.

Feeding Grapes
The first two or three years, each early spring, apply a nitrogen fertilizer. You may not have to do this as the vines mature; it all depends on your observation. Do the vines look vigorous and healthy? Maybe you don't need any fertilizer.

Pruning Grapes
Learn how to grow grapes trained on a vertical trellis or on an overhead arbor -- you can decide which method fits into your garden better, but be sure to have the supports in place before you plant the vines. On a vertical trellis, branches from the previous year's growth are selected to grow along the wires of the trellis or fence. The buds along the stems will flower and set fruit. Just like a fence, the trellis can have two or three levels, and the center stem is left to grow up to the next level.

If you'd like to see your grapes hanging down from overhead, you can train the vines that way, still shortening the branches and selecting just a few to secure to the metal or wood arbor.

The technique for how to grow grapes that are the most productive is good pruning practices. Pruning grapes and the training techniques may sound complicated, but they don't need to be. Each dormant season, keep a few stems that grew last year, and train them on the wires or trellis. You'll probably have to shorten them to fit your space. Prune everything else off. It's shocking to see how much you will cut off, but your grapes will grow better because of it. You'll see buds on the remaining growth: each of those buds will produce several shoots that grow leaves and flowers.

Vines can overproduce grapes. This isn't a case of too much of a good thing, because overproduction leads to poor-quality fruit. Avoid this by thinning flower clusters that look misshapen and cutting off fruit clusters that develop poorly.

Don't jump the gun on harvesting: grapes won't improve in taste after you pick, so sample a grape or two occasionally until they are ripe. Then get busy picking!

Wednesday, February 24, 2016

Planting Rose Bushes – Step By Step Instructions To Plant A Rose Bush

Planting roses is a fun and enjoyable way to add beauty to your garden. While planting roses may seem intimidating for the beginning gardener, in fact, the process is very easy. Below you will find instructions on how to plant a rose bush.

Steps for Planting Roses

Start by digging a hole for planting the rose in. See if the depth is right for your area. By this I mean that in my area I need to plant the actual graft of the rose bush at least 2 inches below what will be my finished grade line to help with winter protection. In your area, you may not need to do that. In areas that get cold winters, plant the rose bush deeper to protect it against the cold. In warmer areas, plant the graft at the soil level.

The grafted area usually is easily seen and looks like a knot or bump out just above the root system start and up onto the rose bush trunk. Some rose bushes are own root and will not have a graft at all, as they are grown on their very own roots. The grafted roses are rose bushes where a hardier rootstock is grafted onto a rose bush that might not be so hardy if left on its own root system.

Okay, now that we have placed the rose bush in the planting hole, we can see if the hole is deep enough, too deep or too shallow. We can also see if the hole is big enough in diameter so as not to have to bunch the roots all up just to get it in the hole. If too deep, add some of the soil from the wheelbarrow and pack lightly into the bottom of the planting hole. Once we have things just right, we will form a little mound in the center of the planting hole using some of the soil from the wheelbarrow.

I put 1/3 cup of super phosphate or bone meal in with the soil in the bottom of the planting holes for the big rose bushes and ¼ cup in the holes for the miniature rose bushes. This gives their root systems some great nourishment to help them get well established.


As we place the rose bush into its planting hole, we drape the roots carefully over the mound. Slowly add soils from the wheelbarrow to the planting hole while supporting the rose bush with one hand. Tamp the soil lightly, as the planting hole is filled to support the rose bush.

At about the half full mark of the planting hole, I like to add 1/3 cup of Epsom Salts sprinkled all around the rose bush, working it lightly into the soil. Now we can fill the planting hole the rest of the way up, tamping it lightly as we go ending up by mounding the soil up onto the bush about 4 inches.

Tips for Care After Planting Rose Bushes

I take some of the amended soil and make a ring around each rose bush to act a bit like a bowl to help catch the rainwater or water from other watering sources for the new rose bush. Inspect the canes of the new rose bush and prune back any damage thereto. Pruning off an inch or two of the canes will help send a message to the rose bush that it is time for it to think about getting to growing.

Keep an eye on the soil moisture for the next several weeks — not keeping them too wet but moist. I use a moisture meter for this so as not to over water them. I sink the probe of the moisture meter down as far as it will go in three areas around the rose bush to make sure I get an accurate reading. These readings tell me if more watering is in order or not.

Source:http://www.gardeningknowhow.com/

Tuesday, February 23, 2016

Your Guide To Growing Carrots

Orange carrots are the traditional standard, but you can try planting white, yellow, crimson, or even purple-skinned carrots, too. More important than color, though, is choosing the right root size and shape to suit your soil. Carrot size and shape varies by type, and there are five major categories. Ball-type, Chantenay, and Danvers carrots have blocky shapes that can handle heavy or shallow soil, while slender Nantes and Imperator carrots need deep, loose soil. All types are available in early and late cultivars; many are disease-and crack-resistant. Some catalogs don’t describe carrots by type, but will point out which cultivars do better in heavy or poor soil.

We Like This: Art Pack Organic Seed Collection
Planting: To produce the best crop possible, double-dig your planting area or build up a raised bed. Loose, rock-free soil is the goal. If you have heavy soil, add plenty of mature compost.

Start sowing this cool-weather crop 3 weeks before the last expected frost; plant again every 2 to 3 weeks after that. Most cultivars take 70 to 80 days to mature, so sow your last planting 2 to 3 months before the first expected fall frost. In Zone 8 and warmer, plant carrots in fall or winter.

Rake the soil free of lumps and stones. Broadcast the tiny seeds, or for easier weeding, plant in rows. Put a pinch of about six seeds to the inch. They will take 1 to 3 weeks to sprout (they germinate more slowly in cold soil than in warm), so mix in a few quick-growing radish seeds to mark the rows. Cover with ¼ to ½ inch of screened compost, potting mix, or sand—a little more in warm, dry areas—to make it easier for the delicate seedlings to emerge. Water gently to avoid washing seeds away; keep the soil continuously moist for best germination.


Related: The Surprising Health Benefits of Purple Carrots

Growing guidelines: Thin to 1 inch apart when the tops are 2 inches high, and be thorough, because crowded carrots will produce crooked roots. Thin again 2 weeks later to 3 to 4 inches apart.

As the seedlings develop, gradually apply mulch to maintain an even moisture level and reduce weed problems. It’s best never to let young carrot plants dry out. However, if the soil dries out completely between waterings, gradually remoisten the bed over a period of days; a sudden drenching may cause the roots to split. Carrots’ feeder roots are easily damaged, so hand pull any weeds that push through the mulch, or cut them off just below the soil surface. Cover carrot crowns, which push up through the soil as they mature, with mulch or soil to prevent them from becoming green and bitter.

Related: Roasted Carrots With Mint And Honey


Problems: The biggest threats to carrots are four-footed critters such as deer, gophers, woodchucks, and rabbits. For controls, see the Animal Pests entry. Otherwise, carrots are fairly problem free.

Keep an eye out—particularly in the Northwest—for carrot rust flies, which look like small green houseflies with yellow heads and red eyes. Their eggs hatch into whitish larvae that burrow into roots. Infested roots turn dark red and the leaves black. Infestations usually occur in the early spring, so one solution is to delay planting until early summer, when damage is less likely. Or cover plants with a floating row cover to keep flies away.

Parsleyworms are green caterpillars with black stripes, white or yellow dots, and little orange horns. They feed on carrot foliage, but they are the larval stage of black swallowtail butterflies, so if you spot them on your carrots, try not to kill them. Instead, transfer them to carrot-family weeds such as Queen Anne’s lace, and watch for chrysalises to form, and later, beautiful butterflies!

The larvae of carrot weevils, found from the East Coast to Colorado, tunnel into carrot roots, especially in spring crops. Discourage grubs by rotating crops.

Nematodes, microscopic wormlike animals, make little knots along roots that result in stunted carrots. Rotate crops and apply plenty of compost, which is rich in predatory microorganisms. (For more controls, see Plant Diseases and Disorders.)

Leaf blight is the most widespread carrot disease. It starts on leaf margins, with white or yellow spots that turn brown and watery. If leaf blight is a problem in your area, plant resistant cultivars.

Hot, humid weather causes a bacterial disease called vegetable soft rot. Prevent it by rotating crops and keeping soil loose. The disease spreads in storage, so don’t store bruised carrots.

Carrot yellows disease causes pale leaves and formation of tufts of hairy roots on the developing carrots. The disease is spread by leafhoppers, so the best way to prevent the problem is by covering new plantings with row covers to block leafhoppers.

Related: How To Start Carrots Outdoors

Harvesting: Carrots become tastier as they grow. You can start harvesting as soon as the carrots are big enough to eat, or leave them all to mature for a single harvest. Dig your winter storage crop before the first frost on a day when the soil is moist but the air is dry. Since spading forks tend to bruise roots, hand-pull them; loosen the soil with a trowel before you pull. Watering the bed before harvesting softens the soil and makes pulling easier.

Carrots are excellent to eat both fresh and cooked. Note that purple-rooted varieties will lose their purple pigment if cooked in water, but tend to keep it when roasted.

To save harvested carrots for winter use, prepare them by twisting off the tops and removing excess soil, but don’t wash them. Layer undamaged roots (so they’re not touching) with damp sand or peat in boxes topped with straw. Or store your fall carrot crop right in the garden by mulching the bed with several inches of dry leaves or straw.

Source:http://www.rodalesorganiclife.com/garden/your-guide-growing-carrots